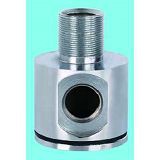
Replacing a pipeline check valve is a task that requires careful planning, the right tools, and a good understanding of the valve's function and installation process. As a pipeline check valve supplier, we are well - versed in the intricacies of these components and are here to guide you through the replacement process.


Understanding the Pipeline Check Valve
Before we dive into the replacement process, it's essential to understand what a pipeline check valve is and its role in a piping system. A check valve is a mechanical device that allows fluid to flow in one direction only. It prevents backflow, which can cause damage to pumps, equipment, and the overall piping system. There are different types of check valves, such as Triangle Check Valve, New Type Check Valve, and Foot Pedal Hydraulic Valve, each designed for specific applications.
Pre - replacement Preparation
- Safety First
Safety should always be your top priority when working on a pipeline system. Wear appropriate personal protective equipment (PPE), including safety glasses, gloves, and protective clothing. Make sure the pipeline is depressurized before starting any work. This can be done by closing the upstream and downstream isolation valves and slowly opening a bleed valve to release any remaining pressure. - Gather the Right Tools
You will need a set of tools for the replacement process. These typically include wrenches, pipe cutters, sealants, and replacement gaskets. The size and type of tools required will depend on the size and type of the check valve and the pipeline. - Identify the Valve
Determine the type, size, and specifications of the check valve that needs to be replaced. This information is crucial for selecting the correct replacement valve. Check the valve's nameplate or consult the system's documentation for details. - Shut Down the System
Before starting the replacement, shut down any pumps or equipment connected to the pipeline. This will prevent any unexpected flow or pressure changes during the replacement process.
Step - by - Step Replacement Process
- Isolate the Valve
Close the upstream and downstream isolation valves to isolate the check valve from the rest of the pipeline. This will prevent fluid from flowing through the valve during the replacement. - Drain the Pipeline
After isolating the valve, open a drain valve or a bleed port to drain any remaining fluid from the section of the pipeline containing the check valve. Make sure to collect the drained fluid in a suitable container for proper disposal. - Remove the Old Valve
Use the appropriate wrenches to loosen the bolts or nuts that hold the check valve in place. Carefully remove the old valve from the pipeline. Be cautious as there may still be some residual pressure or fluid in the valve. - Inspect the Pipeline
Once the old valve is removed, inspect the pipeline for any signs of damage, corrosion, or debris. Clean the pipeline ends thoroughly to ensure a proper seal with the new valve. - Prepare the New Valve
Check the new check valve for any damage or defects. Apply a suitable sealant or install a new gasket on the valve flanges or connections, following the manufacturer's instructions. - Install the New Valve
Carefully position the new check valve in place between the pipeline flanges. Align the holes in the valve flanges with the holes in the pipeline flanges. Insert the bolts or nuts and tighten them gradually and evenly using a torque wrench to the manufacturer's recommended torque settings. - Re - pressurize the System
After the new valve is installed, close the drain valve or bleed port. Slowly open the upstream isolation valve to allow fluid to flow into the pipeline. Check for any leaks around the valve connections. If there are no leaks, open the downstream isolation valve and start the pumps or equipment to restore normal operation.
Troubleshooting and Tips
- Leakage: If you notice any leaks after installing the new valve, check the tightness of the bolts or nuts. You may need to retighten them or replace the gasket.
- Flow Issues: If the flow through the pipeline is not normal, check if the valve is installed in the correct orientation. A check valve should be installed in the direction of the intended flow.
- Noise or Vibration: Excessive noise or vibration may indicate a problem with the valve or the pipeline system. Check for any loose components or improper installation.
Quality Assurance
As a pipeline check valve supplier, we ensure that our valves meet the highest quality standards. Our Triangle Check Valve, New Type Check Valve, and Foot Pedal Hydraulic Valve are designed and manufactured with precision to provide reliable performance. We also offer technical support to help you with the installation and maintenance of our valves.
Contact for Procurement
If you are in need of a pipeline check valve or have any questions about the replacement process, we are here to assist you. Our team of experts can provide you with detailed information about our products and help you select the right valve for your application. Whether you are looking for a Triangle Check Valve, New Type Check Valve, or Foot Pedal Hydraulic Valve, we have a wide range of options to meet your needs. Contact us today to start the procurement process and ensure the smooth operation of your pipeline system.
References
- "Pipeline Valve Handbook" by Valve Manufacturers Association
- "Fluid Mechanics and Hydraulic Machines" by R. K. Bansal
- Technical documentation from various check valve manufacturers