Installing a hose swivel might seem like a daunting task, but with the right guidance, it can be a straightforward process. As a hose swivel supplier, I've seen firsthand the importance of proper installation to ensure the functionality and longevity of these essential components. In this blog post, I'll walk you through the step-by-step process of installing a hose swivel, along with some tips and considerations to keep in mind.
Understanding Hose Swivels
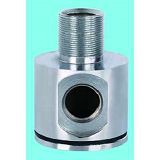
Before we dive into the installation process, let's take a moment to understand what a hose swivel is and why it's important. A hose swivel is a mechanical device that allows a hose to rotate freely, reducing stress and preventing kinking. This is particularly useful in applications where the hose needs to move or be adjusted frequently, such as in industrial settings, automotive applications, or even in your home garden.
There are different types of hose swivels available, each designed for specific applications. For example, Fuel Nozzle Swivel Joint is commonly used in fuel dispensing systems, while Hose Connection Coupling is used to connect hoses together. Aluminium Fuel Nozzle Swivel is another popular option, known for its lightweight and corrosion-resistant properties.
Tools and Materials Needed
Before you start the installation process, it's important to gather all the necessary tools and materials. Here's a list of what you'll need:
- Hose Swivel: Make sure you have the correct type and size of hose swivel for your application.
- Hose: Choose a hose that is compatible with the swivel and the application.
- Wrenches: You'll need a set of wrenches to tighten the connections.
- Teflon Tape: This will help create a watertight seal between the swivel and the hose.
- Safety Glasses and Gloves: To protect your eyes and hands during the installation process.
Step-by-Step Installation Guide
Now that you have all the necessary tools and materials, let's get started with the installation process. Follow these steps carefully to ensure a proper installation:
Step 1: Prepare the Hose
Start by cutting the hose to the desired length. Make sure the cut is clean and straight. You can use a sharp utility knife or a hose cutter for this purpose. Once the hose is cut, remove any burrs or rough edges using a file or sandpaper.
Step 2: Apply Teflon Tape
Wrap Teflon tape around the threads of the hose swivel. Make sure to wrap the tape in the direction of the threads to prevent it from unraveling. Apply at least 3-4 layers of tape to ensure a tight seal.
Step 3: Attach the Hose Swivel
Insert the hose swivel into the end of the hose. Make sure the swivel is fully inserted and that the threads are aligned. Use a wrench to tighten the swivel onto the hose. Be careful not to overtighten, as this can damage the threads or the swivel.
Step 4: Connect the Other End
If you're connecting the hose to another component, such as a nozzle or a fitting, repeat the process of applying Teflon tape and tightening the connection. Make sure all connections are secure and leak-free.
Step 5: Test the Installation
Once the installation is complete, turn on the water or fluid supply and check for any leaks. If you notice any leaks, tighten the connections further or apply additional Teflon tape.


Tips and Considerations
Here are some additional tips and considerations to keep in mind during the installation process:
- Choose the Right Swivel: Make sure you choose a hose swivel that is compatible with the hose and the application. Consider factors such as the size, material, and pressure rating of the swivel.
- Use the Right Tools: Use the appropriate tools for the job, such as wrenches and Teflon tape. Using the wrong tools can damage the swivel or the hose.
- Follow the Manufacturer's Instructions: Always follow the manufacturer's instructions for installation and maintenance. This will ensure the proper functioning and longevity of the swivel.
- Inspect the Swivel Regularly: Regularly inspect the swivel for any signs of wear or damage. Replace the swivel if necessary to prevent leaks or other issues.
Conclusion
Installing a hose swivel is a relatively simple process that can be done by anyone with basic DIY skills. By following the steps outlined in this blog post and keeping the tips and considerations in mind, you can ensure a proper installation and enjoy the benefits of a functional and reliable hose swivel.
If you're in the market for a high-quality hose swivel, look no further. As a leading hose swivel supplier, we offer a wide range of products to meet your needs. Whether you're looking for a Fuel Nozzle Swivel Joint, a Hose Connection Coupling, or an Aluminium Fuel Nozzle Swivel, we have you covered.
Contact us today to discuss your requirements and explore our product range. Our team of experts is ready to assist you with your purchase and provide you with the best solutions for your application.
References
- Manufacturer's instructions for hose swivels
- Industry standards and best practices for hose installation